A Swedish version of the Quickstart guide is available here.
Step-by-Step Manual for Using IFPI Sweden’s Web Service for Rights Holders
Table of Contents:
- Create a Rights Holder Account with IFPI Sweden (New Rights Holders Only)
- Create a User in IFPI Sweden’s Web Service
- Log in to IFPI Sweden’s Web Service
- Ensure Your Account Information is Correct
- View the Recordings Registered to Your Account
- Register Recordings Individually
- Register Recordings via Spotify Drag-and-Drop
- Register Multiple Recordings at Once (via Excel File)
- Unclaim Recordings (End Date or Revoke)
- List of Unclaimed Rights
- View Payments, Statements, and Playlists
- Contact IFPI Sweden Directly Through the Web Service
- Important Information About ISRC Codes
Step 1 – Create a Rights Holder Account with IFPI Sweden (New Rights Holders Only)
Your company must have a Rights Holder Account with IFPI Sweden to log into the web service and register your recordings. If your company already has an account, proceed to Step 2.
To register a new company, complete one of the following authorisations (Power of Attorney):
(A) Sweden and abroad (Rest of World); or
(B) Sweden only
Ensure the email address specified in the “User” field matches the email address used to log into IFPI Sweden’s web service. IFPI Sweden will confirm when the company is registered. Once confirmed, proceed to Step 2.
Step 2 – Create a User in IFPI Sweden’s Web Service
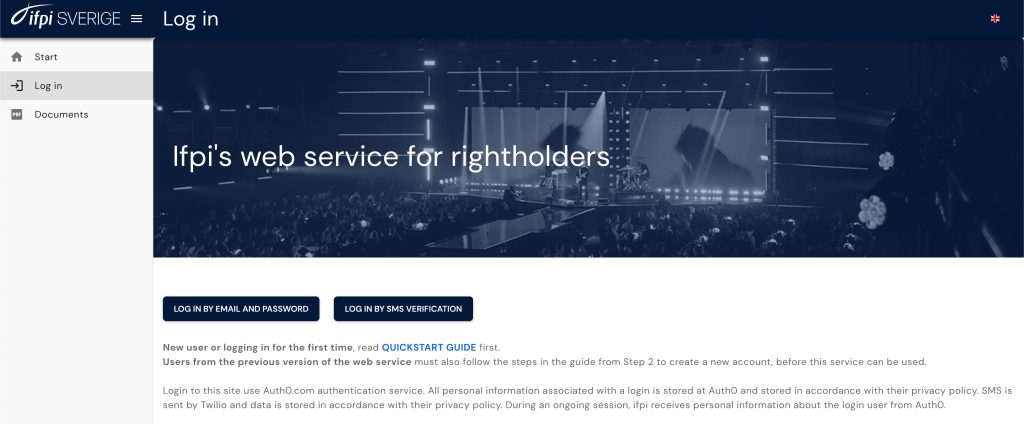
A) Go to IFPI Sweden’s web service (my.ifpi.se).
B) Click on “Log in” in the menu bar and then ”Log in by email and password”:
C) Click on “Sign up” (in Swedish: “Registrera konto”):
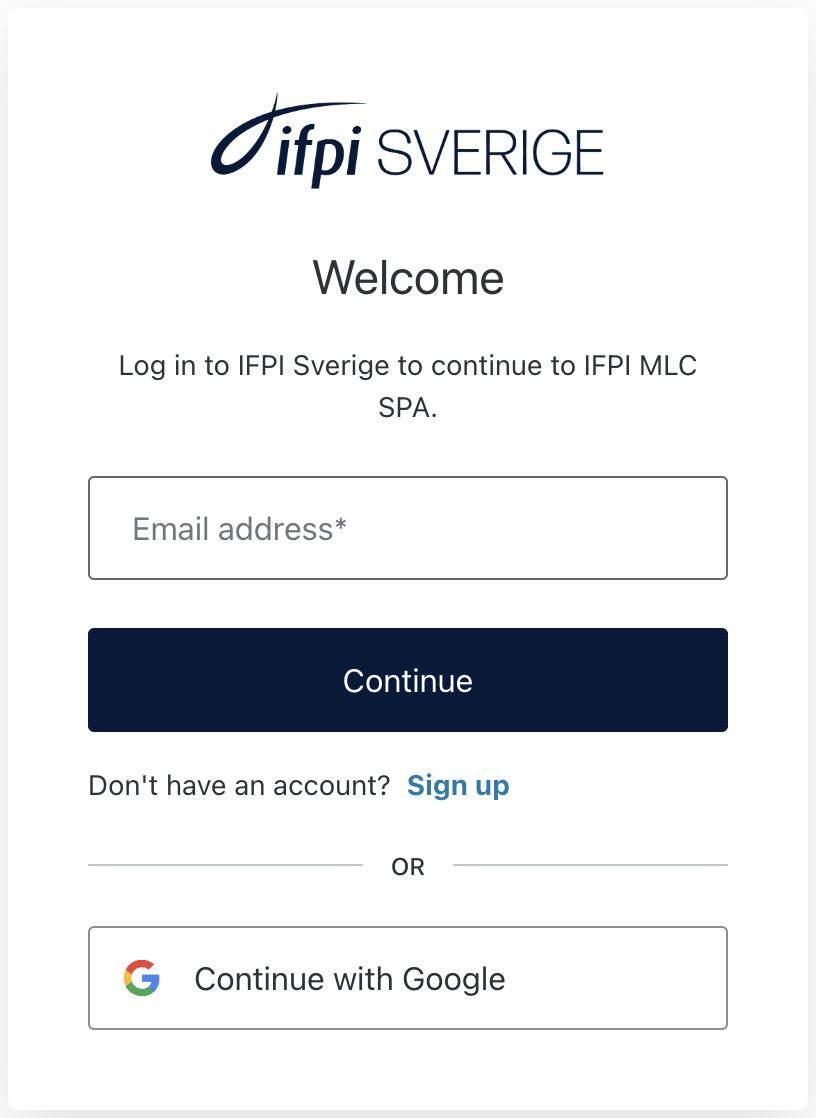
D) Create a user account by entering your email address/password. Confirm your email address through the verification email sent to you.
Ensure the email address used to log in is the same as the one registered in Step 1. For issues or queries, contact web@ifpi.se.
Step 3 – Log in to IFPI Sweden’s Web Service
A) Go to IFPI Sweden’s web service (my.ifpi.se)
B) Click on “Log in” in the menu bar:
C) Enter your email address and password from Step 2. You must verify your user via SMS or a one-time code from a two-factor authentication app (e.g., Auth0 Guardian or Google Authenticator). Download the app, scan the QR code, and enter the six-digit code generated.
Step 4 – Ensure Your Account Information is Correct
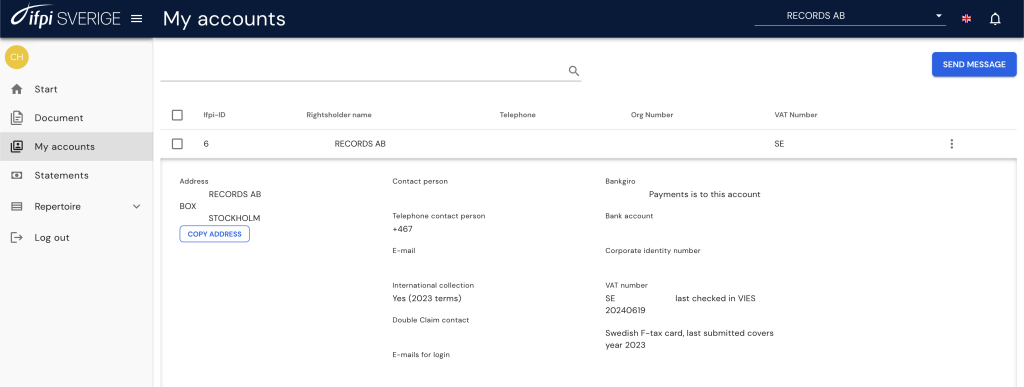
A) Go to “My Accounts” in the menu bar.
B) Click on an account line to view more information about your account:
Step 5 – View the Recordings Registered to Your Account
A) Go to “Repertoire” in the menu bar.
B) Click on “My Rights” to see the recordings registered to your account:
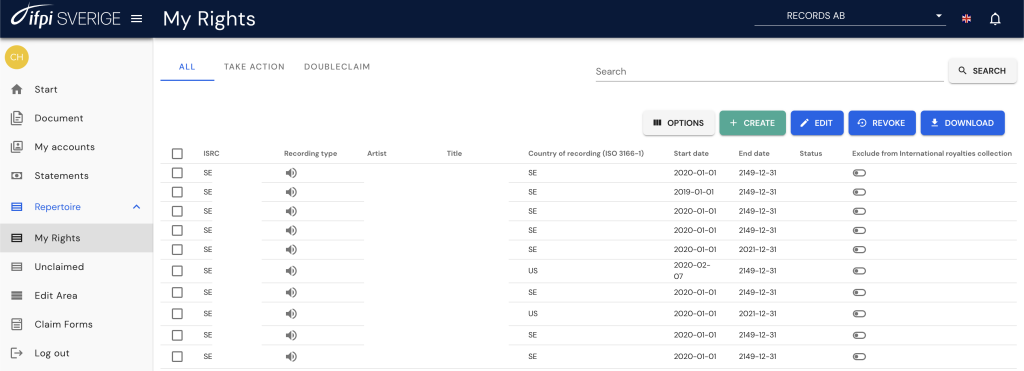
Note: The search is a free text search but can be refined with prefixes:
- A: search by artist
- T: search by title
- L: search by record label
- I: search by ISRC code.
Step 6 – Register Recordings Individually (Manually)
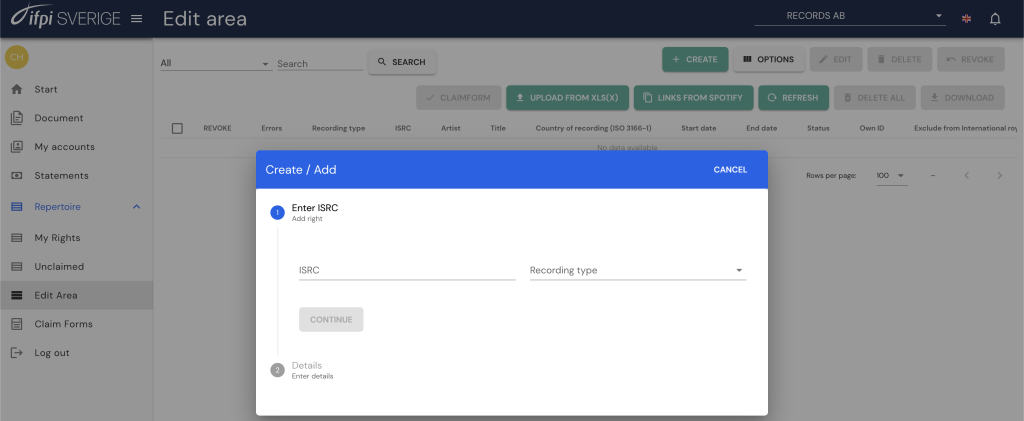
A) Go to “Edit Area” in the menu bar and click “Create”:
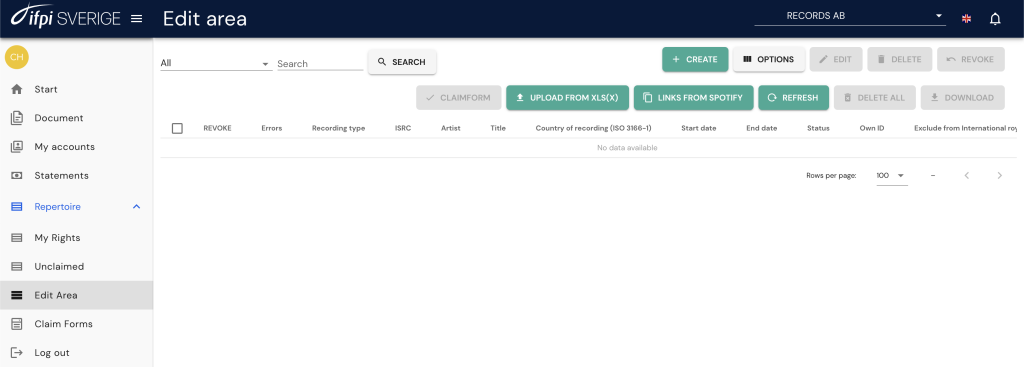
B) Enter the ISRC code and select whether it’s an “Audio Recording” or “Video Recording” (i.e. Music Video).
C) Enter additional metadata and click “Save”:
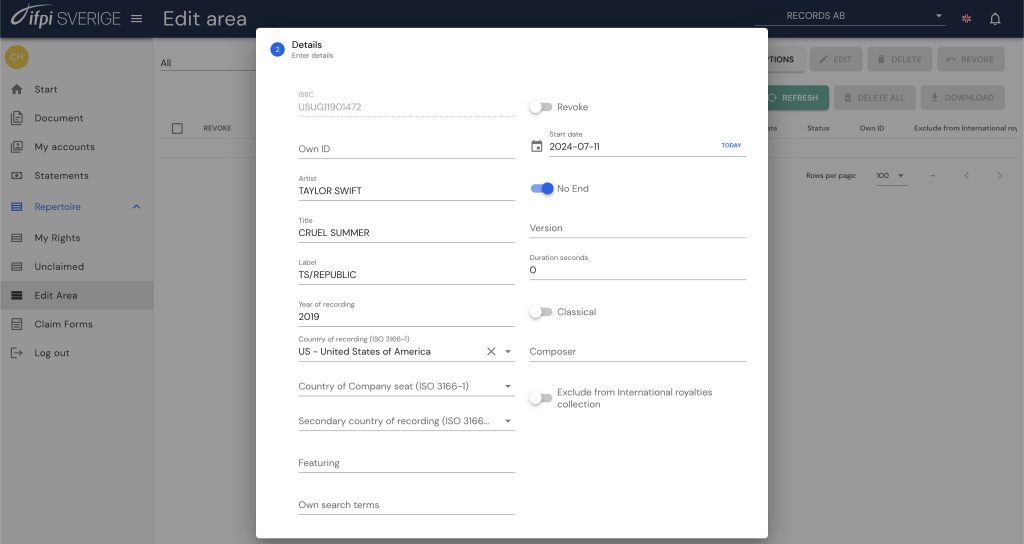
Correct any errors indicated by a warning triangle until you see a green symbol:

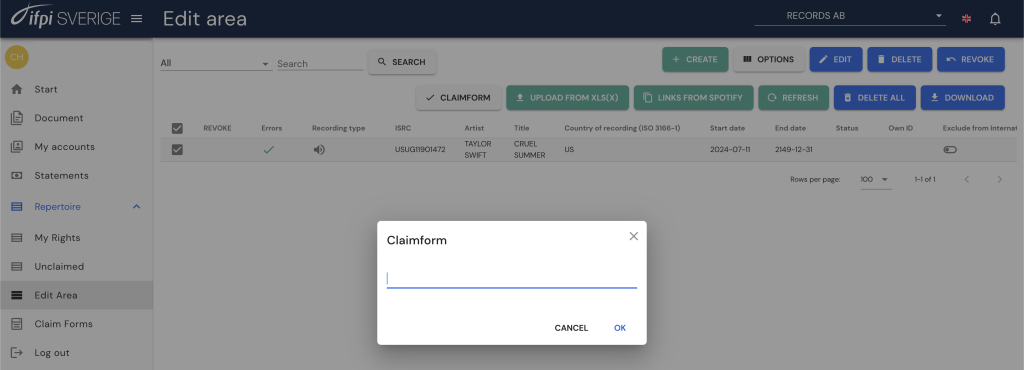
D) Once all recordings are added in the “Edit Area”, select all and click “Claim Form”.
E) Name your claim form (you can use any name):
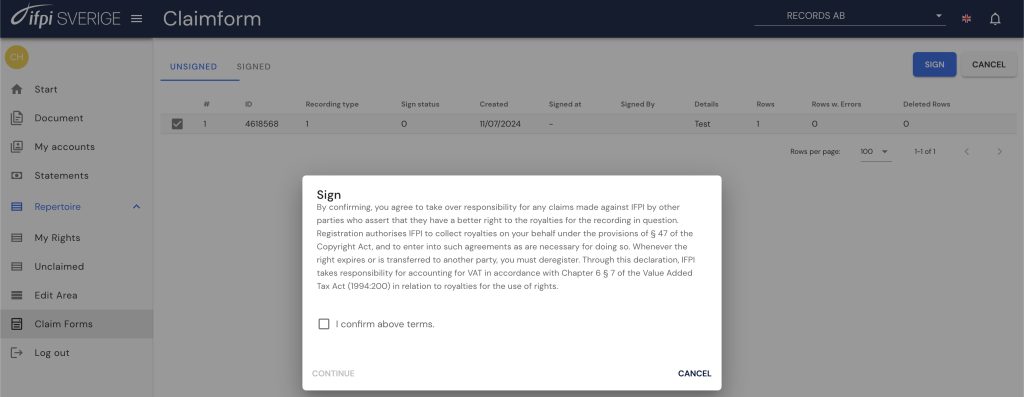
F) Go to “Claim Forms” in the menu bar, select the claim form, and click “Sign”:
Step 7 – Register Recordings via Spotify Drag-and-Drop
A) Go to “Edit Area” in the menu bar and click “Links from Spotify”:
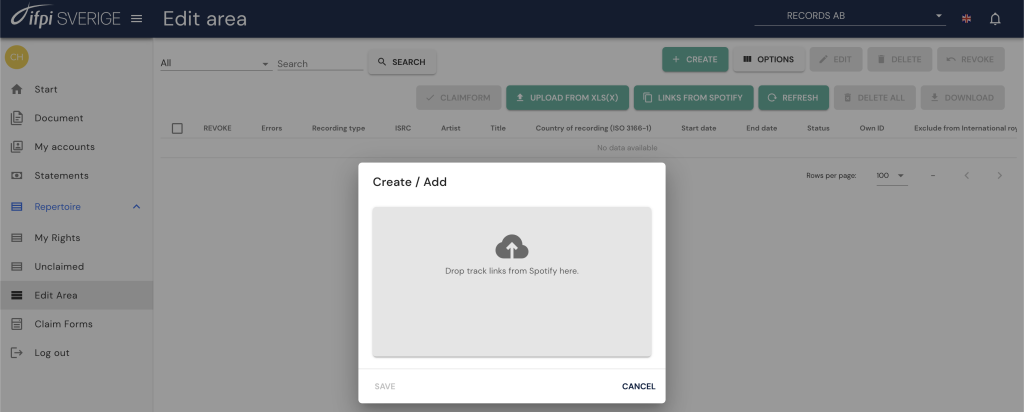
B) Drag and drop the tracks from the Spotify client:
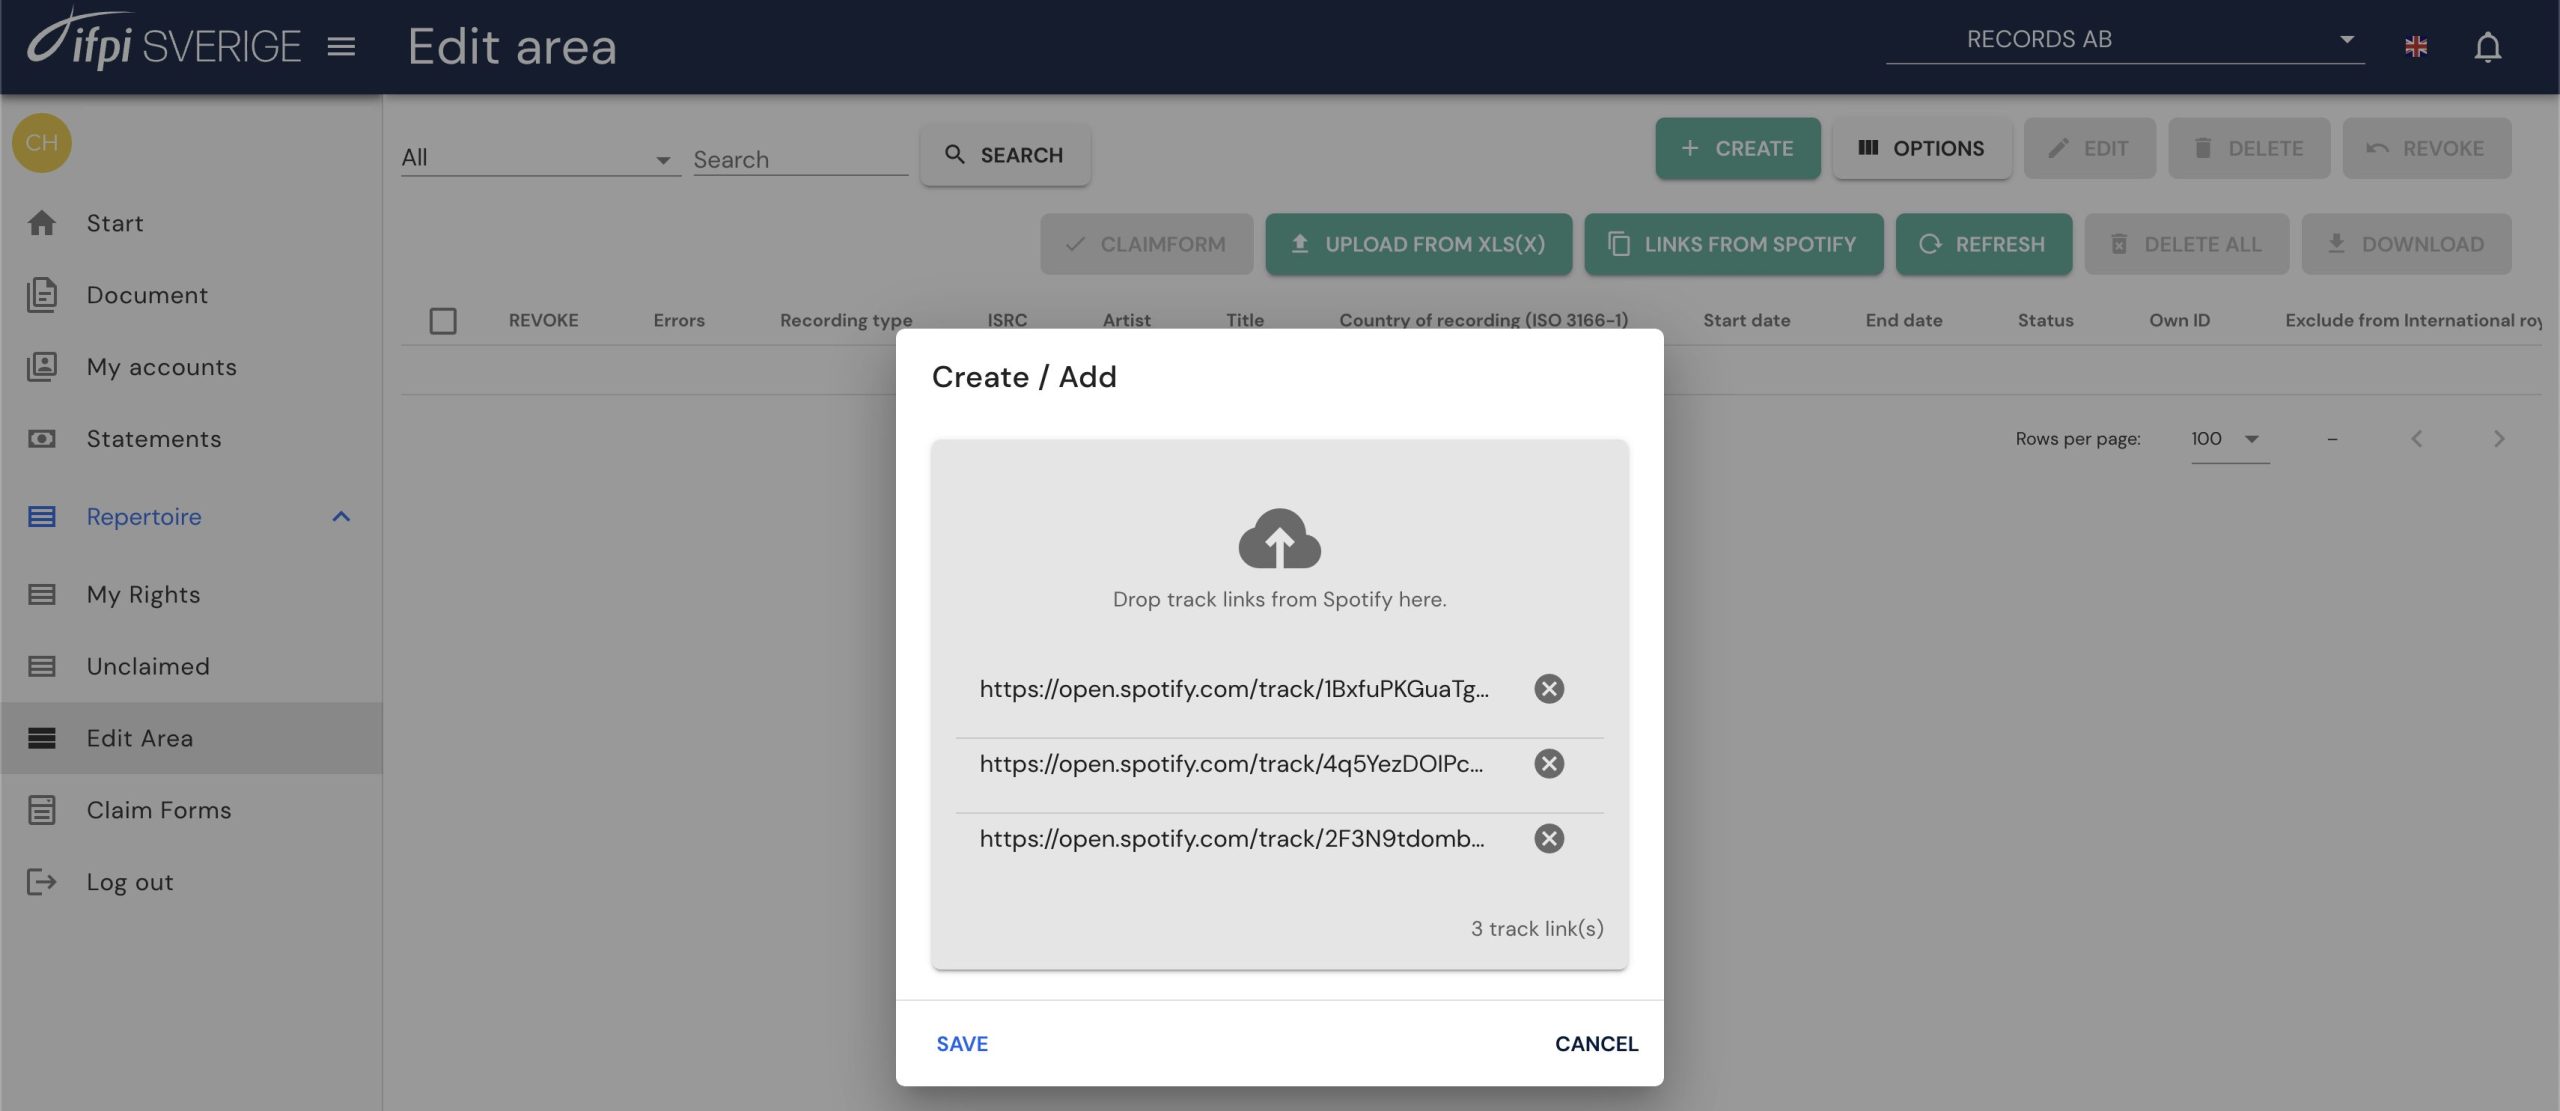
C) Click “Save”, adding the tracks to the Edit Area.
D) Once all recordings are added, select all and click “Claim Form”.
E) Name your claim form (you can use any name):
F) Go to “Claim Forms” in the menu bar, select the claim form, and click “Sign”:
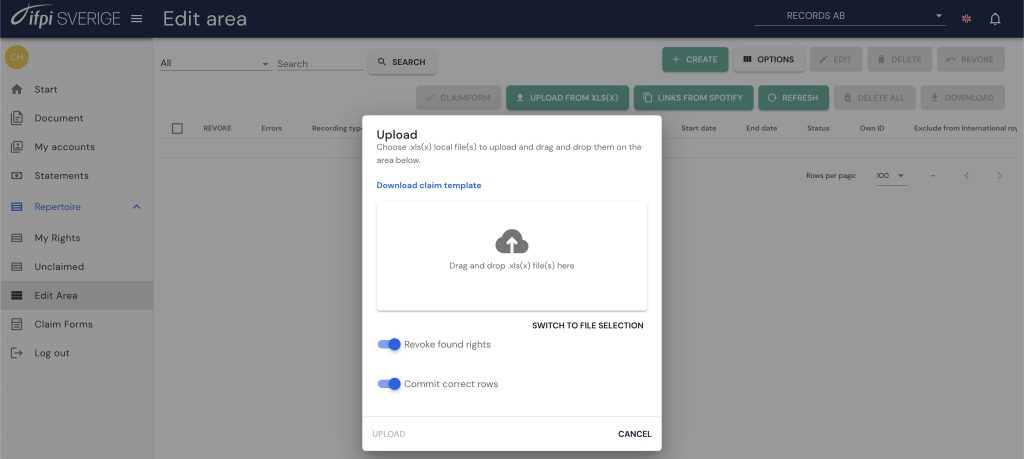
Step 8 – Register Multiple Recordings at Once (via Excel File)
A) Go to “Edit Area” in the menu bar and click “Upload from XLS(X)”:
B) Click “Download claim template” to get the required format and metadata for multiple recordings:

To read more about the definitions of the columns and how to fill them in, see the document ‘Claim file specification’ under the ‘Documents’ menu in the web service.
C) Fill in the template (mandatory fields are highlighted in yellow) and upload the Excel file.
D) Go to “Claim Forms” in the menu bar, select the claim form, and click “Sign”:
Step 9 – Unclaim Recordings (End Date or Revoke)
Terminating an existing right can be done in two ways: (1) Set an End Date; or (2) Revoke.
Option 1: Set an End Date
Choose this option if you want the right to cease as of a certain usage date. Money will continue to be allocated to the right if the usage was made before the End Date.
A) Go to “My Rights” in the menu bar, select the recording(s), and click “Edit”:
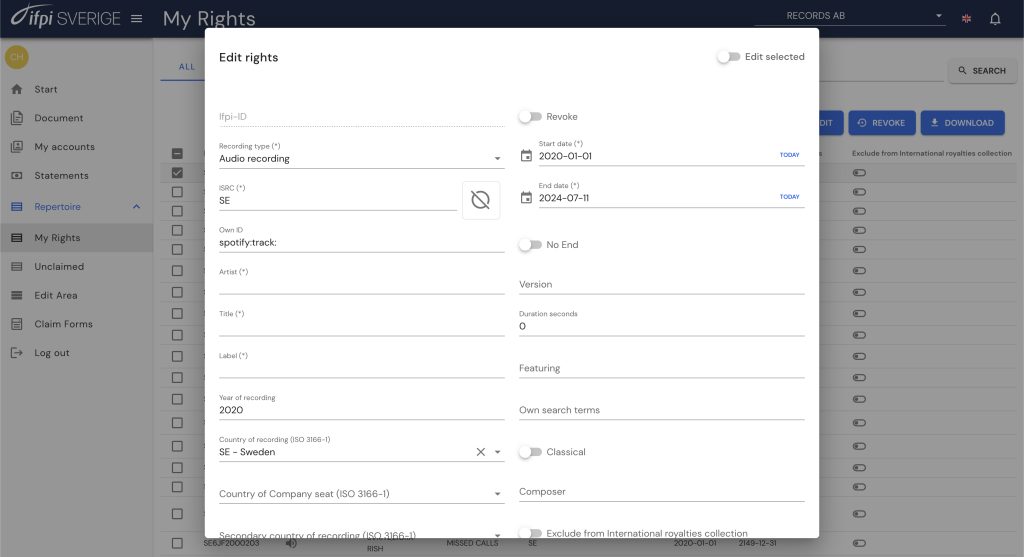
B) Deselect “No End” and enter an “End Date”.
C) Scroll down and click ”Save”.
Option 2: Revoke a Right
Choose this option if you want the right to be removed (i.e. revoked). No money will further be allocated to the right regardless of the usage date.
A) Go to “My Rights” in the menu bar, select the recording(s), and click “Revoke”.

B) To revoke multiple recordings via an Excel file, go to “Edit Area”, click “Upload XLS(X)”, and tick “Revoke found rights”:
Step 10 – List of Unclaimed Rights
A) Go to “Unclaimed” in the menu bar to view recordings that have not been claimed by any rights holder.
B) Select the recordings that belong to you and click “Add”:
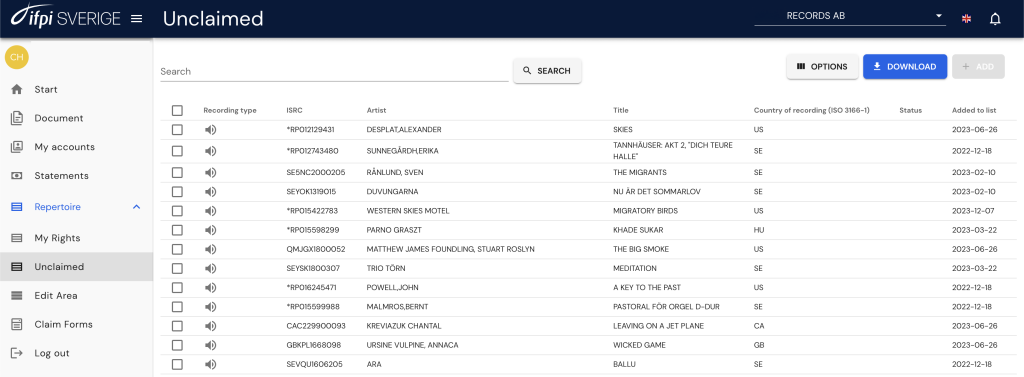
C) The recordings will now be in your “Edit Area”. Create a claim form as per Step 6.
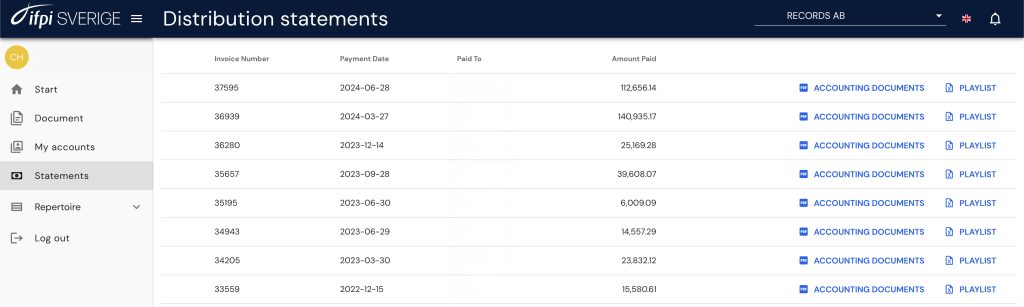
Step 11 – View Payments, Statements, and Playlists
A) Go to “Statements” in the menu bar.
B) Click “Accounting Documents” or “Playlist” to download detailed payment information.
Step 12 – Contact IFPI Sweden Directly Through the Web Service
If you encounter problems or have questions, contact IFPI Sweden via the web service. Click the alarm clock button at the top right and then “Send message to IFPI Sweden”. Response time is typically within 1-2 working days.
Step 13 – Important Information About ISRC Codes
ISRC (International Standard Recording Code) is an international standard developed to enable the identification of sound recordings. The ISRC code is a unique and lifelong identifier for each recording. Once assigned, this code should never be changed or replaced – it follows the recording forever. Through the ISRC code, streamlined administration and more precise distribution of compensations are made possible.
The ISRC code consists of twelve alphanumeric characters that identify: the master owner’s unique company code (first registrant code); recording year (year of reference); and track (designation code).
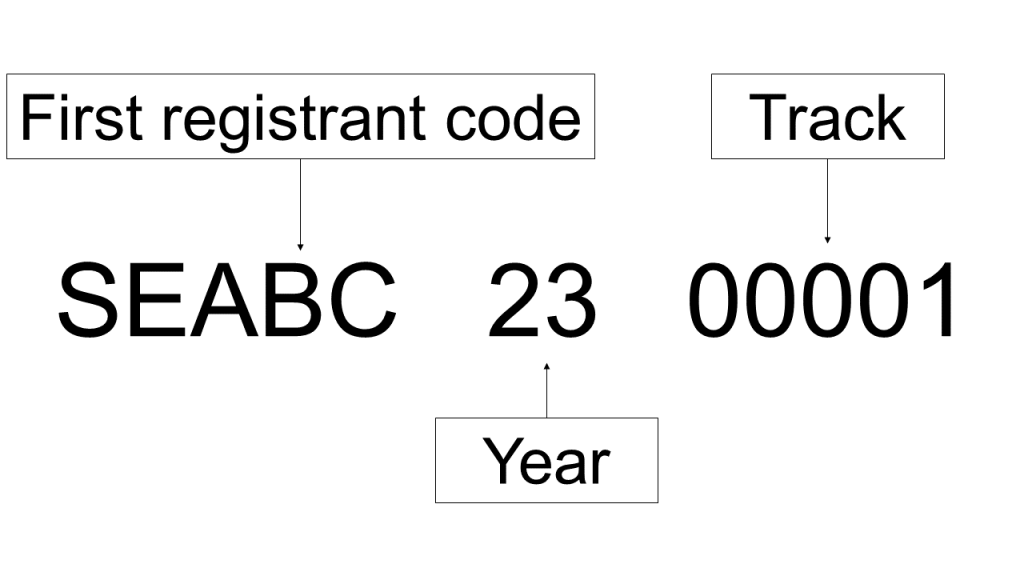
Read more about ISRC codes and see examples at ifpi.se/isrc